Step 1: Sculpt Buddha from clay
: Create a blanket mold- I achieved this by tightly wrapping my clay sculpted Buddha in saran wrap. Then rolling out 1/4'' clay wall to build around contouring the saran wrapped Buddha. Next, splitting the Buddha into four sections by another 1/4'' clay wall (which is what you can see dividing the plaster mold below). I then plastered each section taking out the second clay walls as the plaster dried. After the plater mold was completed, I took the mold apart, removed the saran wrap and the rest of the clay walls from the original sculpted Buddha. Placed only the plaster mold back together over the original clay Buddha and tightened it with rubber ties. I filled in the cracks with clay to seal it from the next step of pouring liquid silicon. Drilled a hole about an inch and half through the top of the mold to pour the silicone. Let dry over night. The next day took the mold apart, carved out the clay, put the mold back together with only the silicone and plaster parts. Tied with rubber ties, the placed upside down in a bucket. Melted the brown wax, and poured the wax in the silicone mold for fifteen minutes, then poured it back out letting a thin wax wall left inside the mold. After cooling I patched up and holes in the wax and took it carefully out of the plaster/silicone mold.


The Next process is to sprue up the two halves of wax that I cut.
After the two halves are sprued up, the next step is to dip them into the ceramic mixer to make a ceramic shell. This is done many times, some with fine and corse sands to build up the shell.
After hardening the shell, the end of the shell must be cut off with a chop saw, then burn out the paper cup to expose the wax sprue, which is then put into a kiln to melt the wax out of the ceramic shell.
All the while the bronze is in it's own kiln heating up to molten degrease
The sand pits are prepared with the ceramic shells (after the wax has been emptied)
Then we suite up in loge sleeved clothing, hard leather boots, leather aprons, leather jackets, fire proof shin guards, and foot coverings, bandanna gloves, and face shield.
After the pour the shell is filled with bronze and taken out of the sand pits to cool
Busted away the ceramic shell
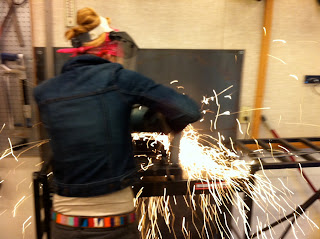
Next step is to cut off the sprue and clean up the bronze and piece the Buddha back together again!
Then buff the uneven milky surface of the bronze off and file down the seam
last step is to wax seal the bronze


